
telstra 4gx usb modem manual
Overview of the Telstra 4GX USB Modem
The Telstra 4GX USB Modem is a compact, plug-and-play device offering 4G connectivity. Designed for mobility, it features automatic network connection and a user-friendly web interface. It supports both USB and Wi-Fi connections, enabling multiple devices to access the internet simultaneously. Ideal for reliable portable broadband, it suits both work and personal needs.
1.1 Key Features and Capabilities
The Telstra 4GX USB Modem supports 4G connectivity with download speeds up to 150Mbps. It features a built-in web interface for monitoring data usage and device status. The modem offers both USB and Wi-Fi connectivity, allowing multiple devices to connect. LED indicators provide status notifications, and it includes advanced security features like MAC filtering and firewall support.
1.2 Supported Networks and Speeds
The Telstra 4GX USB Modem supports 4G/LTE, 3G, and 2G networks, ensuring wide coverage. It delivers download speeds up to 150Mbps and upload speeds up to 50Mbps. The modem automatically switches between networks based on signal strength, providing a stable connection. It is optimized for Telstra’s 4GX network, offering reliable performance across supported areas.
System Requirements for the Telstra 4GX USB Modem
Compatible with Windows and macOS operating systems, the modem requires a USB-A port and a minimum of 2GB RAM for optimal performance. A modern web browser is also necessary for accessing the web interface.
2.1 Compatible Operating Systems
The Telstra 4GX USB Modem is compatible with Windows 10, 8, 7, and macOS 10.12 or later. It supports automatic driver installation on these systems, ensuring seamless connectivity. The modem is plug-and-play, with no additional software required for basic functionality. A compatible web browser is needed for accessing the device’s web interface.
2.2 Minimum Hardware Specifications
The Telstra 4GX USB Modem requires a USB-A port, at least 1GB of RAM, and a 1.6GHz dual-core processor or equivalent. It supports both 32-bit and 64-bit architectures. The device is compatible with laptops and desktops, ensuring reliable performance across various hardware configurations for seamless internet connectivity.

Setting Up the Telstra 4GX USB Modem
Plug the modem into a USB port, insert the SIM card, and connect via USB or Wi-Fi. Access the web interface at m.home or 192.168.0.1 to configure settings.
3.1 Installing the SIM Card
Disconnect the USB modem from your PC.
Carefully slide the back cover to access the SIM slot.
Insert the SIM card with the gold contacts facing downward and click it into place.
Replace the back cover and reconnect the USB to your device.
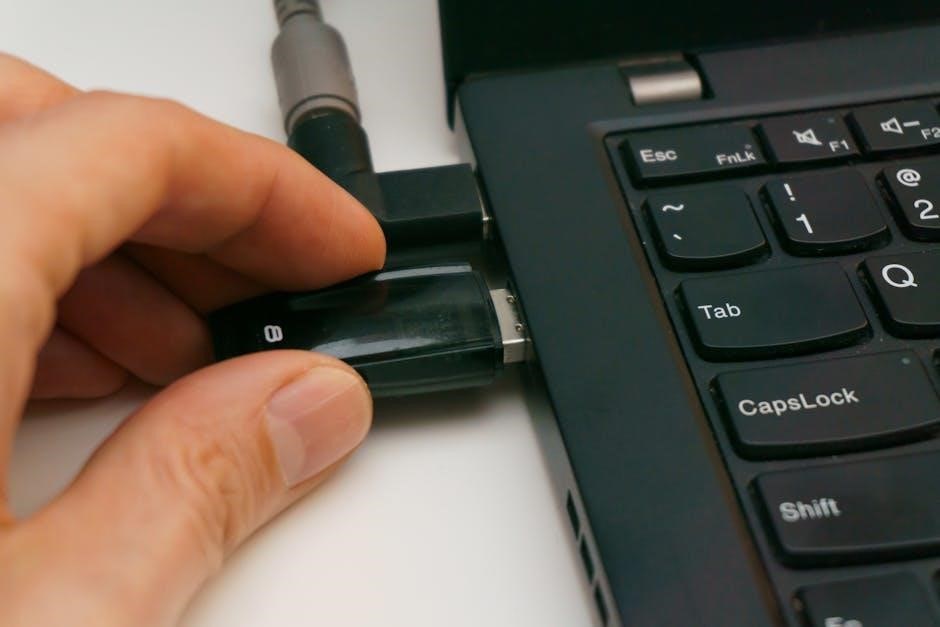
3.2 Connecting the Modem to a Device
Plug the Telstra 4GX USB Modem into a vacant USB-A port on your computer or device. The modem will automatically identify and connect to the Telstra 4G network. Once connected, open your default web browser and navigate to m.home or 192.168.1.1 to access the device’s web interface for further setup and management.
3;3 Accessing the Web Interface
Open your default web browser and enter m.home or 192.168.1.1 in the address bar. This will direct you to the modem’s web interface. Log in using the default username and password, which can be found on the device’s label. From here, you can manage settings, monitor data usage, and configure advanced features securely.
Using the Telstra 4GX USB Modem
Connect via USB or Wi-Fi to enable internet access for your devices. The modem supports up to 10 simultaneous connections, making it ideal for both personal and professional use.
4.1 Connecting via USB
Insert the Telstra 4GX USB Modem into a vacant USB-A port on your device. Ensure the SIM card is installed correctly. The modem will automatically connect to the internet. LED indicators will show connection status: blue for 4G, green for 3G, and blinking for active data transfer. For best results, turn off your PC’s Wi-Fi before connecting.
4.2 Connecting Wi-Fi Enabled Devices
Enable Wi-Fi on the Telstra 4GX USB Modem and locate its network name (SSID) on your device. Connect by entering the Wi-Fi password. Up to 10 devices can join simultaneously. The default SSID and password are printed on the modem’s label. For security, customize these settings via the web interface if desired.
4.3 Logging into the Device Management Interface
Open a web browser and enter http://192.168.1.1 or m.home to access the interface. Use the default username and password (found on the modem’s label). If customized, enter your credentials. This portal allows managing settings, monitoring data usage, and configuring advanced features for optimal performance.
Web Interface Features
The web interface offers tools to monitor data usage, view device status, and manage connected devices. It provides real-time insights and essential controls for optimizing your connectivity experience.
5.1 Monitoring Data Usage
The web interface provides a detailed overview of data consumption, allowing users to track usage history and remaining allowances. Real-time updates ensure accurate monitoring, helping manage data limits effectively. Alerts can be set for notifications when usage thresholds are reached, promoting efficient data management and preventing overage charges.
5.2 Viewing Device Status and Signal Strength
The web interface displays real-time device status, including network registration and connection type. Signal strength is shown as a percentage or bar graph, helping users assess coverage. Additional details like current IP address and connected devices are also provided, ensuring comprehensive monitoring and optimal performance of the modem.
5.3 Managing Connected Devices
The modem’s web interface allows users to view and manage connected devices. Features include monitoring active connections, blocking unauthorized devices, and setting data usage limits. Parents can also enable parental controls to restrict access to certain content, enhancing security and ensuring a controlled internet environment for all connected users.

Network and Wi-Fi Settings
Configure WLAN settings, enable MAC filtering, and set up port forwarding through the web interface. Adjust SSID, password, and security modes to secure and manage your network effectively.
6.1 Configuring WLAN Settings
Access the web interface to configure WLAN settings. Enable or disable the Wi-Fi network, change the SSID, and set a security mode like WPA2. You can also modify the Wi-Fi password and channel settings to optimize performance and security for connected devices. Ensure all changes are applied to update the network configuration effectively.
6.2 Setting Up MAC Filtering
MAC filtering allows you to control device access by filtering Wi-Fi connections based on MAC addresses. Enable the WLAN MAC Filter in the web interface, then add devices to a whitelist or blacklist. Enter each MAC address, select the filter type, and apply changes to secure your network from unauthorized access effectively.
6.3 Enabling Port Forwarding
To enable port forwarding, access the web interface and navigate to Settings > Features > Port Forwarding. Click Add and configure the WAN and LAN settings for the service. Enter the required port numbers and select the device on your network. Apply the changes to allow external devices to access specific services like FTP or gaming servers.
Security Features
The Telstra 4GX USB Modem includes robust security features like changing the SSID and password, enabling the firewall, and setting up IP filters to protect your network and data.
7.1 Changing the SSID and Password
To enhance security, the Telstra 4GX USB Modem allows users to customize the SSID and password. Access the web interface via 192.168.1.1 or m.home, navigate to Settings > Wireless > WLAN, and update the SSID and password fields. Save changes to secure your network with strong, unique credentials.
7.2 Enabling the Firewall
Access the Firewall settings via the web interface by logging into 192.168.1.1. Navigate to Settings > Features > Firewall. Enable the firewall to activate IP filtering, enhancing security by controlling incoming and outgoing traffic. This feature helps protect against unauthorized access and potential threats to your network and connected devices.
7.3 Setting Up IP Filters
Configure IP filters by accessing the web interface at 192.168.1.1. Navigate to Settings > Features > IP Filter. Define IP addresses to whitelist or blacklist, controlling network access. This feature enhances security by restricting unauthorized devices and managing data flow, ensuring a safer connection for all connected devices on your network.
Troubleshooting Common Issues
Address common issues like poor signal or connectivity problems by restarting the modem or adjusting its position. For device recognition problems, ensure proper USB port connection and consult the manual for additional solutions.
8.1 No Service or Poor Signal
If experiencing no service or poor signal, check signal strength in the web interface. Restart the modem, ensure it’s in an area with optimal coverage, and verify SIM card installation. Consult the manual for additional troubleshooting steps to resolve connectivity issues effectively.
8.2 Device Not Recognized
If the device is not recognized, disconnect and reconnect it. Restart your computer and modem. Ensure drivers are updated and properly installed. Check the USB port for functionality. Consult the manual for troubleshooting steps to resolve the issue and ensure proper connectivity.
8.3 Connectivity Problems
Troubleshoot connectivity issues by restarting the modem and device. Ensure the SIM card is correctly inserted and signal strength is adequate. Check network settings and ensure the modem is properly configured. If issues persist, reset the modem to factory settings or consult the manual for advanced troubleshooting steps to restore connectivity.
Maintenance and Care
Regularly clean the modem with a soft cloth and avoid exposure to liquids or extreme temperatures. Update firmware periodically for optimal performance and security. Resetting to factory settings can resolve persistent issues, restoring default configurations for reliable operation.
9.1 Cleaning the Modem
Regularly clean the modem using a soft, dry cloth to remove dust and dirt. Avoid liquids or harsh chemicals, as they may damage the device. Ensure the modem is dry and free from moisture to maintain optimal performance and prevent corrosion. Avoid exposing it to extreme temperatures or physical stress.
9.2 Updating Firmware
To update the firmware, log into the modem’s web interface using the default IP address. Navigate to the Management or System Update section. Check for available updates and download the latest version. Follow on-screen instructions to install the update. Ensure the modem is not disconnected during the process to avoid damage. Restart the device after completion.
9.3 Resetting to Factory Settings
To reset the modem to factory settings, log into the web interface. Navigate to the Management or System Settings section and select Factory Reset. Confirm the action. The modem will reboot, reverting all settings to default. Note that this erases custom configurations, including Wi-Fi settings. Ensure you have backups before proceeding.

Product Specifications
The Telstra 4GX USB Modem supports 4G/LTE (Cat 1), 3G, and 2G networks. It features a USB interface, built-in antennas, and compatibility with Windows and macOS operating systems.
10.1 Technical Details
The Telstra 4GX USB Modem supports 4G/LTE (Cat 1), 3G, and 2G networks. It features a USB 2.0 interface, internal antennas, and compatibility with Windows and macOS. The device includes LED indicators for network status and supports up to 10 simultaneous Wi-Fi connections, ensuring reliable performance across various operating systems and environments.
10.2 Compliance and Certifications
The Telstra 4GX USB Modem complies with Australian communications standards. It holds certifications for electromagnetic compatibility and safety, ensuring it meets local regulatory requirements. The device adheres to global network standards, providing users with a reliable and secure connection experience.
Safety Information
Avoid using the Telstra 4GX USB Modem near metallic structures or in areas with high electromagnetic interference. Keep the device dry and handle it with care to prevent damage.
11.1 Electromagnetic Interference
Electronic devices like the Telstra 4GX USB Modem can be sensitive to electromagnetic interference (EMI). Avoid using it near medical devices, such as pacemakers, or in environments with high EMI. Ensure the device is not exposed to metallic structures or areas emitting strong electromagnetic waves, as this may disrupt signal reception and performance.
11.2 Operating in Restricted Areas
Avoid using the Telstra 4GX USB Modem in environments sensitive to electromagnetic interference, such as hospitals or aircraft. Switch off the device in restricted areas to prevent interference with other equipment. Ensure compliance with local regulations and avoid using unauthorized accessories, as they may violate telecommunication standards and degrade performance.
11.3 Handling the Device
Protect the modem from liquids, dust, and extreme temperatures to ensure reliable operation. Avoid physical stress, bending, or dropping the device. Do not apply adhesive labels, as they may cause overheating or affect antenna performance. Handle with care to maintain optimal functionality and avoid damage to internal components.
Warranty and Support
The Telstra 4GX USB Modem comes with a standard warranty covering manufacturing defects. For support, contact Telstra via phone, email, or live chat. Visit their official website for detailed warranty terms and support options.
12.1 Warranty Terms
The Telstra 4GX USB Modem is covered by a standard warranty for manufacturing defects. The warranty period is typically [X] months from purchase, subject to verification. Terms may vary by region and require proof of purchase. For accurate details, visit Telstra’s official website or contact their support team.
12.2 Contacting Telstra Support
For assistance with the Telstra 4GX USB Modem, visit Telstra’s official website or call their customer support hotline. Live chat and email options are also available. Additionally, in-person support can be accessed at Telstra retail stores. Ensure to have your device details ready for efficient troubleshooting and resolution of any issues.